
Table of Contents
- Why Preparation Matters Before Your Building Inspection
- Gather Your Documents and Property History
- Common Building Defects in Melbourne Homes
- What to Expect During the Inspection
- How to Read a Building Inspection Report
- Negotiating After a Bad Building Report
- Your Next Steps After the Inspection
- Frequently Asked Questions
Last Updated: September 17, 2026
Why Preparation Matters Before Your Building Inspection
Learning how to prepare for a pre-purchase building inspection starts long before the inspector arrives. Most buyers treat it as a box-tick exercise. They schedule it, show up, and hope for the best. That’s where costly mistakes happen.
How you prepare for a pre-purchase building inspection shapes what the inspector finds and how useful the report becomes. It determines whether you spot red flags early or discover expensive problems after you’ve signed. It’s the difference between walking away from a bad deal and overpaying for someone else’s problem.
According to RubyHome’s 2026 analysis of home inspection findings, 86% of home inspections reveal at least one item that requires repair. Nearly half of buyers then use those findings to negotiate a lower purchase price. But that only works if the inspection was thorough and you know how to act on the results.
At Your Australian Property Buyers Agents, we’ve seen what separates buyers who negotiate confidently after an inspection from those who panic or overpay. The difference isn’t luck. It’s preparation.
Preparation transforms an inspection from a formality into a negotiation weapon. Know what to expect, what to look for, and how to use the findings to protect your investment.
Gather Your Documents and Property History
Before your inspector arrives, collect every piece of information about the property. This isn’t optional. It’s your foundation.
Start with the contract of sale and any seller disclosure documents. These reveal what the seller already knows about the property’s condition. If they’ve disclosed previous water damage, termite activity, or structural repairs, the inspector will look harder at those areas.
Request the original building plans and any renovation or repair records from the seller. If the property has had work done, new roof, plumbing upgrades, extension, you need documentation. Plans show you what was built and how. Repair records show you what’s failed before and what’s been fixed.
Ask your conveyancer for the title documents. These flag easements, covenants, or restrictions that affect the property. A covenant might prevent you from extending. An easement might give neighbours access through your land. The inspection won’t catch these, but they matter for your decision.
Look up council records for any building permits or complaints. The council website holds this information. Permits show what work was approved. Complaints flag problem areas, water damage, structural issues, or disputes with neighbours.
What to gather:
- Contract of sale and seller disclosures
- Original building plans and specifications
- Previous inspection reports (if available)
- Maintenance logs and repair records
- Council permits and building history
- Title documents and easements
- Photos of past damage or repairs
If the seller won’t provide documents, that’s a warning sign. It suggests they’re hiding something. Push back through your conveyancer or consider walking away. This is where Property Due Diligence becomes critical, a thorough assessment of what’s been disclosed, what’s been hidden, and what the property’s actual condition tells you about its real value.
Common Building Defects in Melbourne Homes
Melbourne’s climate and older building stock create predictable problems. Knowing these helps you spot what the inspector should be checking.
Rising damp is endemic in older properties. Water travels up from the ground through brick and concrete. It damages plaster, rots timber, and creates mould. You’ll see it as dark staining at the base of walls, peeling paint, or a musty smell. Rising damp is expensive to fix properly.
Termite activity thrives in Melbourne’s humidity. Termites eat timber from the inside out. By the time you see damage, structural integrity may be compromised. The inspector will look for mud tubes, hollow timber, and evidence of past treatment. If termites are present, remedial work and ongoing prevention add significant cost.
Asbestos is found in homes built before the 1980s. It’s in insulation, floor tiles, roofing, and pipe lagging. Asbestos itself isn’t dangerous if undisturbed, but removal is expensive and regulated. If the inspector suspects asbestos, you’ll need a specialist assessment before deciding to proceed.
Roof and guttering problems are common. Rusted gutters, missing tiles, or poor drainage cause water infiltration. Water damage spreads fast, it rots timber, damages insulation, and creates mould. Roof repairs can be costly.
Electrical safety issues include outdated wiring, missing safety switches, or non-compliant installations. Old knob-and-tube wiring or aluminium wiring poses fire risk. Upgrading to modern standards is costly and disruptive.
Plumbing leaks hide behind walls and under floors. Slow leaks cause structural damage before you notice them. Burst pipes or corroded copper require replacement. Water damage remediation is expensive and time-consuming.
Sub-floor and foundation problems develop over decades. Poor site drainage causes water pooling under the house. Concrete cracks indicate settling or movement. Timber decay in floor joists compromises structural integrity.
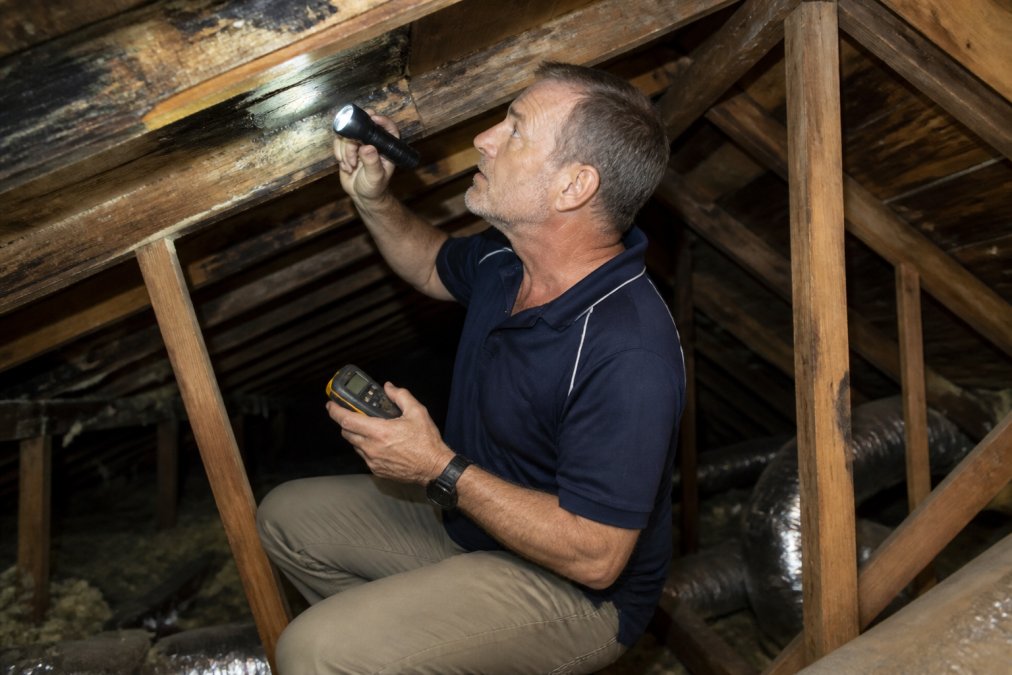
Moisture detection is critical. Excess moisture promotes mould, rot, and pest activity. The inspector uses moisture meters to identify problem areas before visible damage appears.
Don’t ignore “minor” defects noted in the report. A small roof leak becomes major water damage in six months. A minor electrical issue becomes a safety hazard. Act on findings early or negotiate the seller’s liability.
What to Expect During the Inspection
Understanding how to prepare for a pre-purchase building inspection means knowing that a thorough inspection takes 2 to 4 hours. The inspector examines accessible areas systematically. Understanding the process helps you know what’s being checked and why.
The inspector starts outside. They assess the roof from ground level (and sometimes from above if safe), check guttering and downpipes for damage or blockages, examine the external walls for cracks or water staining, and evaluate site drainage and grading. Poor drainage is a major red flag, water pooling around the foundation causes structural problems.
Next, they move inside. They test electrical outlets and switches, check for safety switches and circuit breakers, examine visible wiring, and assess the condition of the switchboard. They look at plumbing, taps, toilets, showers, and check for leaks under sinks and around pipes. They inspect the hot water system and its age.
They examine all accessible roof cavities and sub-floors. This is where serious defects hide. Rising damp, termite damage, asbestos, poor ventilation, and structural issues become visible here. They check insulation condition and look for evidence of pest activity.
They assess walls and ceilings for cracks, water staining, or movement. They examine doors and windows for operation and weather sealing. They check the condition of timber, flooring, architraves, window frames, for rot or insect damage.
The inspector documents findings with photos and detailed notes. Modern reports include thermal imaging to detect moisture and heat loss that’s invisible to the eye.
What inspectors can and cannot assess:
- Can: Structural integrity, building and pest defects, electrical safety, plumbing condition, roof condition, moisture detection
- Cannot: Asbestos identification (requires specialist), precise cost of repairs, code compliance for future work, pest risk assessment
Inspectors work to building standards and codes. In Victoria, building compliance is governed by the Building Act 1993 and the Building Code of Australia which sets minimum standards for safety, accessibility, and performance. The inspector checks whether the property meets these standards.
How to Read a Building Inspection Report
The report is your negotiation document. Understanding it means understanding your use.
Most reports structure findings by category: roof, external, internal, electrical, plumbing, structural, and pest. Each section lists observations and defects. Defects are typically rated by severity: minor maintenance items, major structural issues, or safety hazards.
Minor maintenance items are cosmetic or wear-and-tear issues. Peeling paint, worn carpet, or loose tiles fall here. These are expected in older properties. They’re negotiating points but not deal-breakers.
Major defects require repair or replacement. Rising damp, roof leaks, electrical rewiring, or plumbing issues cost money and time. These affect your offer price and your decision to proceed.
Safety hazards are non-negotiable. Missing safety switches, asbestos in friable form, or structural movement that threatens safety must be addressed before settlement. Some buyers walk away here.
Read the report critically. Look for patterns. Multiple moisture issues suggest a systemic drainage problem, not isolated leaks. Evidence of past repairs suggests the seller knew about problems and tried cheap fixes.
Check what the report doesn’t say.
Request a sample report from your chosen inspector before hiring them. Ensure it’s comprehensive, includes photos, and explains findings in plain language. A vague report is useless for negotiation.
Negotiating After a Bad Building Report
A bad report isn’t the end. It’s your negotiation starting point.
Your Next Steps After the Inspection
Once you have the report, you have decisions to make.
Frequently Asked Questions
What documents should I gather before a building inspection?
Collect the contract of sale, any previous building or pest reports, council records, maintenance logs, original construction drawings if available, and evidence of past repairs or remedial work. If the property is strata or multi-story, get copies of body corporate minutes and any defect rectification notices. These documents help the inspector understand the property’s history and identify patterns of recurring issues. Professional surveyors typically recommend providing this information upfront so they can focus on structural integrity and hidden defects during the physical inspection.
How long does a building inspection typically take?
A standard building inspection usually takes 2 to 4 hours, depending on the property size and complexity. Older homes, multi-story properties, or those with known issues may take longer. Most contracts provide a cooling-off period after you sign, which gives you time to commission the inspection, receive the report, and decide whether to proceed. Plan to have the inspection completed well before this window closes so you can review findings and negotiate if needed.
What are the most common building defects found in Melbourne properties?
Rising damp, termite activity, roof leaks, and electrical safety issues are frequent findings in Melbourne homes. Older properties often show asbestos in insulation or floor tiles, while newer builds may have moisture detection problems in sub-floors or inadequate site drainage. According to industry data, 86% of home inspections reveal at least one item requiring repair. The key is understanding which defects are minor maintenance issues versus structural problems that affect the property’s long-term viability and value.
Can I use inspection findings to negotiate a lower price?
Yes. About 46% of buyers use inspection results as negotiation leverage to secure a lower purchase price. Once you have the report, you can request the seller fund remedial work, provide a price reduction, or offer a repair allowance. The strength of your negotiation depends on the severity of defects and current market conditions. Some defects are deal-breakers; others are negotiable. This is where independent advice matters, knowing which issues justify walking away versus which ones you can negotiate on.